In this Using… series article, we’re going to take a look at a potentially mind-blowing production technique for iOS. One of the best things about my “heavy duty” DAW on the PC, Propellerhead Reason, is that you can automate pretty much everything. From simple fader moves and bypass switches to low-level synth and effect parameters, this provides an incredible amount of power for tweaking and controlling a mix. The same has typically not been available on iOS DAWs like Cubasis.
Now, Cubasis does have a fairly extensive automation feature for many things in the DAW – volume, panning, send levels, etc. But extending this to effects, especially external effects like other AU and IAA apps, is not “really” provided. But for certain effects apps that support MIDI, there is often a useful workaround. This article will look at a specific workflow using Yonac’s ToneStack. This is a very deep and complex guitar-oriented pedalboard and amp and cabinet simulator, but the principles can be applied to many other effect apps. There are several distinct steps to the solution:
- Audio routing
- MIDI routing
- MIDI configuration
- MIDI recording or drawing
- Playback
- Audio routing – nothing tricky here. Just put ToneStack in one of the Insert effect slots, as shown here for track 1. This example is using an audio track, but could also be a MIDI track. And the effect could also be a send effect.
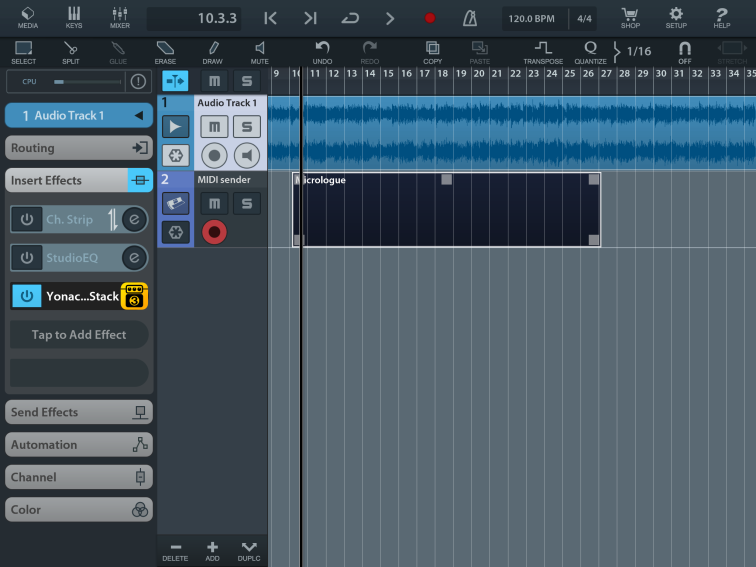
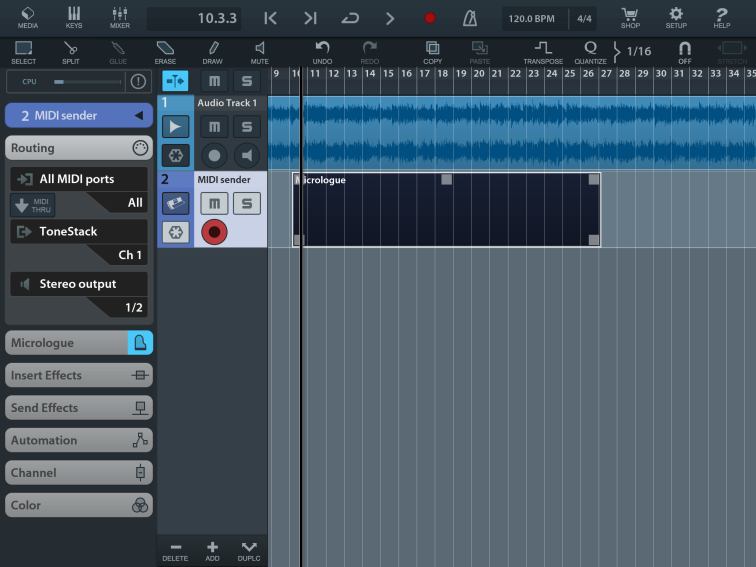
- MIDI routing – this is a little trickier as you need a separate MIDI track with the output going to the external effect app, as shown here for track 2. Note that MIDI channel 1 is being sent to ToneStack.
- MIDI configuration – this is maybe the least intuitive aspect of the whole technique and setting this up will differ based on the effect app. As shown here, for ToneStack, I’ve gone into Settings, then MIDI Learn (Units), then selected the wah pedal, and selected CC1 on MIDI channel 1 to control the pedal position. If you are using a MIDI keyboard or other control surface, you could assign a knob or slider just by wiggling it, but I’ve manually assigned CC1 in order to keep all this self-contained on the iPad itself. Using CC1 also makes the next step possible.
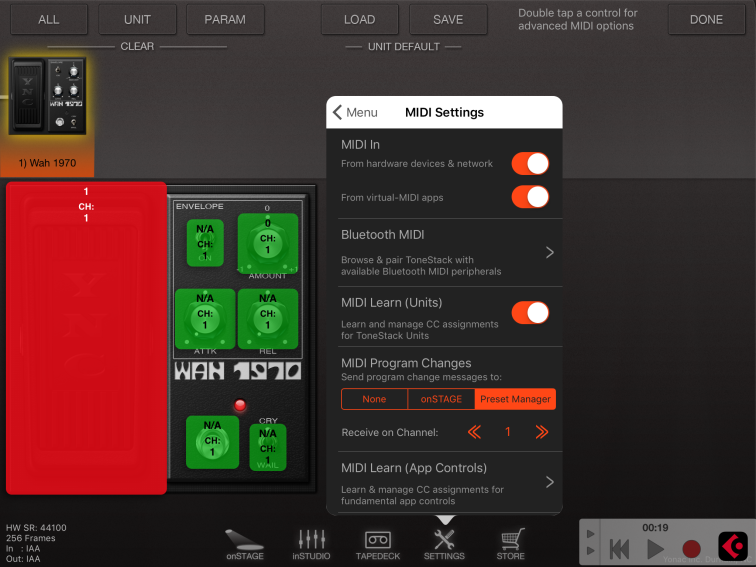
By the way, a very important point for ToneStack at this point is to save your work as a preset in ToneStack. This is vital as Cubasis cannot store this in its session for IAA apps. This may be not so much an issue for AU apps.
- MIDI recording or drawing – note in this screenshot that I’ve set the MIDI instrument to Micrologue and toggled on the onscreen keyboard which includes a mod wheel controller. Mod wheel is the same as CC1 so working the onscreen mod wheel is sending that MIDI data to ToneStack and changing the wah pedal position.
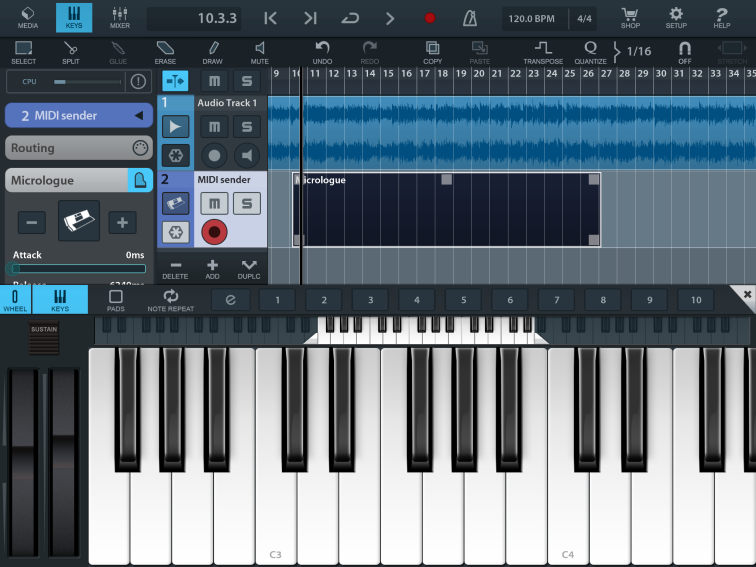
Also note that track 2 is armed for recording. By clicking record and moving the mod wheel, those mod wheel moves are recorded as a MIDI clip in Cubasis. The clip looks empty in the track lane because there are no note on/off events here (although I suppose that could make sense for certain apps), but double tap into the clip and you can see the CC data. This data could also have been drawn directly instead of recorded in real time.

- Playback – nothing tricky here. You have MIDI data recorded (or drawn) on the MIDI track, so pressing Play in Cubasis will resend that data to the effect app. That’s what automation is all about.
Obviously the key here is that the effect app has to have a fairly robust MIDI implementation, and not all of them do. But it is worth the effort to dig into the settings or the user guide and find those that do. This can add a lot of precision and movement to your iOS mixes.

Could you tell me what theme are you utilizing on your web site?
It looks wonderful.
LikeLike
It’s called “Escutcheon”. One of the stock WordPress themes.
LikeLike